SHTANK RPG Project Code Snippets
About Me Page
Projects Page
My Senior Capstone/Production Blog
SHTANK RPG Project Code Snippets
About MilkShed Games
Introduction
SHTANK RPG is a strategy RPG set in a wacky universe of superheroes and focuses on the many members of the titular “Super Hero Team of Atomic Nashbalms from Kansville”.
On this page, I will show some code snippets from across the project.
“Path Ability” Design Pipeline Solution
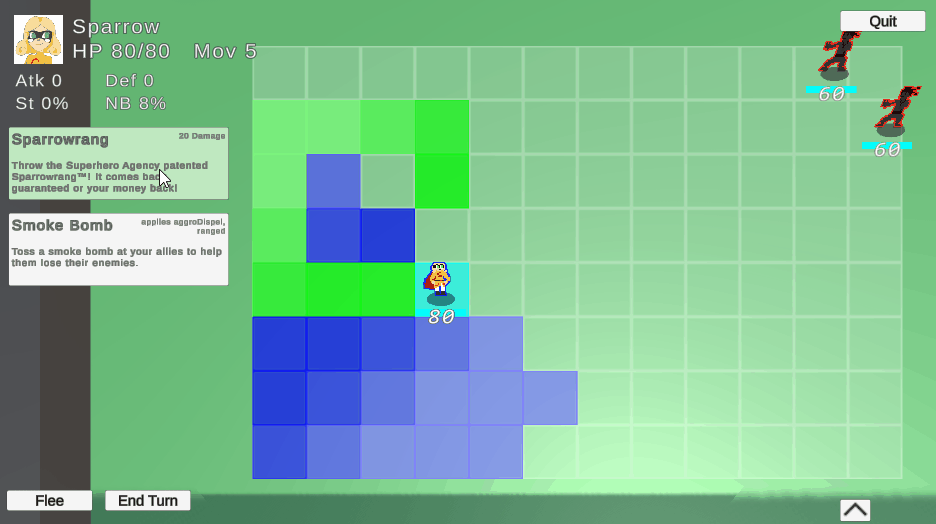
In SHTANK, characters can attack using abilities that can cover different numbers of grid spaces in different shapes and can apply different effects to allies and enemies. One of SHTANK’s ability types is the “Path Ability”. It is designed to allow a character to follow a path for their attack, as if they are dashing along a certain pattern. Theoretically, this sort of ability could be defined by a list of directions like “left”, “right”, “up”, or “down”. However, the abilities in SHTANK can also be rotated to face the four cardinal directions, meaning that directions like “up” or “left” aren’t sufficient enough.
To combat this, I am using directions that are relative to the direction the player is aiming an ability. These directions include “forwards”, “backwards”, “sideways”, and “sidewaysOpposite”. To explain, if an ability is being aimed upwards, “forwards” is up, “backwards” is down, and “sideways” is right. Here is an example of an ability that moves in a sort of circle:

And here is the ability itself being used on the grid. Notice that the ability can also be flipped, essentially causing the “sideways” and “sidewaysOpposite” instructions to switch directions.
The code to accomplish something like this would normally be pretty bulky, with having to check all four relative directions, check if the ability is flipped, and then reevaluating them into their absolute directions. However, by using C#’s reflection feature, I can prevent at least a bit of nesting.
First, in the ProcessPathAbility function, the absolute meaning of each relative direction is passed into SavePath, where the last four parameters passed into the function are string representations of “forwards”, “sideways”, “sidewaysOpposite”, and “backwards”. For example, if an ability is flipped and the character is facing downwards, then we pass “down” as forwards, “left” as sideways, etc.

Then, within SavePath, we begin to loop through the instructions of the path ability and based on the relative direction, we pass some information and the absolute direction into SavePathSegment.

Finally in SavePathSegment, we get to our reflection where we can use the string of the direction (remember this is now the absolute direction: “up”, “down”, “left”, or “right”) to grab the connecting grid space from the current grid space by name; each grid space has four potential connections, one in each cardinal direction.
The resulting line is:
(GridSpace)currentGridSpace.GetType().GetField(direction).GetValue(currentGridSpace)
to get the next grid space along this path ability. We pass this grid space into TryAddGridSpace, which returns false if the grid space we try to access is null or if the space is non-navigable, defined by the ability itself.

All of this converting from more design-suitable directions to strings and using Reflection to get the grid spaces of the ability helps to keep the code cleaner and avoids an additional nested switch statement.
2D Character Animation System and Tool
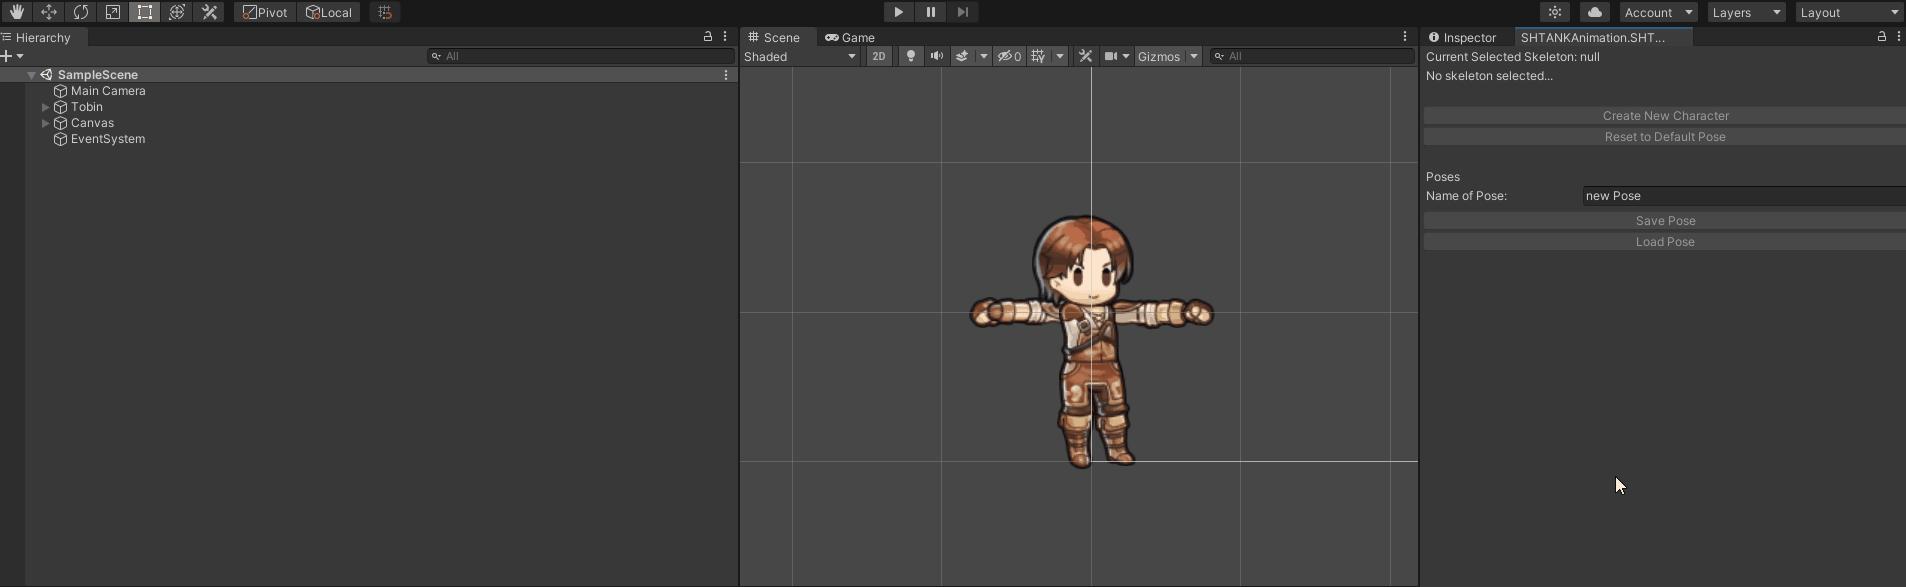
In order to lower the scope of character art in a game that will feature so many characters, I’ve implemented a 2D skeleton system to allow for easy, data-driven animation. In combination with Unity’s built-in Hierarchy, the Skeleton class is able to store each body part/joint that makes up a character.

Having a character organized this way is a good way to get started but isn’t all that’s needed. I can edit the pose by rotating each joint of the character but it’s not super useful if there isn’t an easy way to create content with it. Using Unity’s EditorWindow class, I’m able to create a custom editor window for my project to let me edit and save poses of the character.
Within Unity’s OnGUI function, which allows rendering in the editor, GetReferences is called to grab several bits of information about the currently selected Skeleton and Rig. The editor window finds the Skeleton from the user’s selection in the Hierarchy and is able to either find a saved Rig Scriptable Object or save a new one.
-
If the user has an object selected in the hierarchy and it has a Skeleton component, it will be saved as the activeSkeleton.
-
If a Skeleton was found, it will try to resolve the rigName using the name of the selected object.
-
If there’s an asset stored with rigName as its name, it will be put into an array and stored as activeRig.
-
Finally, if a rig was found, a Pose will be stored as activePose if a Pose with the name poseName exists (poseName is set using a text field).

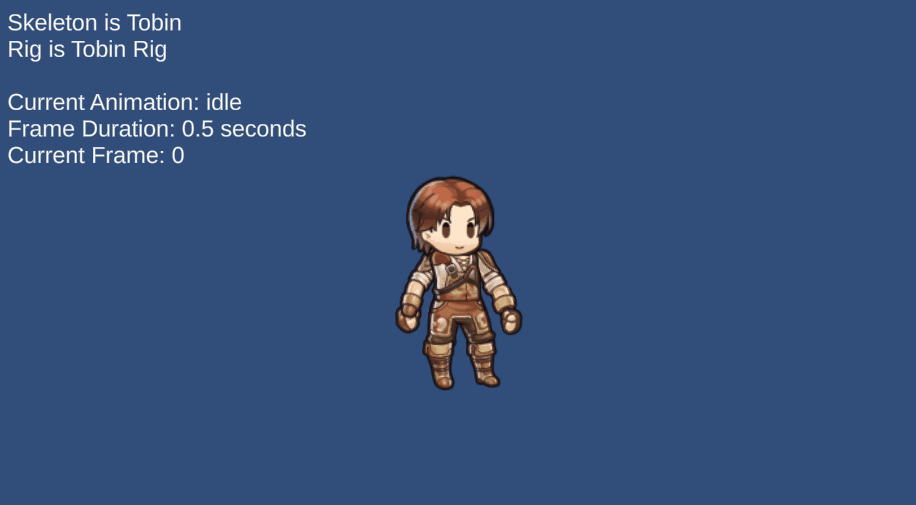
As mentioned in the GetReferences function, a Pose can be saved. Additionally, a Pose can be loaded if the input name matches the existing Rig’s saved poses. In the gif below, I am able to use the button to load poses but I can also use this opportunity to show you the different kinds of poses I can save with the tool!
(sprites downloaded from The Spriter’s Resource here)
Finally, using functions to set the position and rotation of each joint and a calculated interpolation value between 0 and 1, I am able to interpolate the poses between one another to create animations!

Enemy AI with Minimax
Enemy AI with minimax…